Sandbox environment
The sandbox allows you to test inbound/outbound messaging without purchasing a dedicated sender name. You can use this feature to test the product or API before paying or using it in a production environment.
How to use sandbox
- Open Dashboard, select your organization from the list, and then in the left sidebar, choose Sandbox
- Add a phone number or email to the sandbox contacts list. You must set a phone number or email that you set up as
Start new conversation fromin the Messages app. Check this section to learn more about this setting. - Initiate a conversation in the sandbox sender name by pressing
Compose message in sandboxfrom your Mac or iPhone. Or scan a QR code from your phone. - Once the sandbox sender receives your message, it will try to match a contact with your sandbox list. Once it’s matched, this message will be assigned to your account.
While a contact is added to the sandbox list, all requests and webhooks will be force-redirected to the sandbox. Please don’t forget to remove your contact from the sandbox when you are ready for production.
Sandbox limitation
- You can add up to 5 contacts to your sandbox list.
- Sandbox works only with your default (first) organization in the account.
- Group chats are not supported in the sandbox. You need to order a dedicated sender name for this feature.
- As soon as the “sandbox” receives a message from a contact and matches it to your account, it will open a 24-hour messaging window. This window resets every time you receive an inbound message from the contact.
- The Sandbox cannot initiate a conversation with a random contact. For every outbound message to a new contact, that contact must first send a message to the sandbox - as confirmation that the recipient is under your management.
- Sandbox may filter some messages if they contain: OTP codes, currencies, or some marketing/finance content.
- If you’re using SMS/RCS for sandbox messaging, you should ensure your cell plan supports text messaging, or, if you’re using a non-US number, that it supports international texting. You need to check in advance whether it’s supported, as your carrier may charge you for sending an international SMS.
- If you send SMS/RCS from some other A2P services to the sandbox, it may be filtered or flagged as suspicious. You should send SMS only from a personal device.
Please note: when you have finished working with a sandbox, you should remove your contacts from the sandbox list. Otherwise, all requests related to contacts in this list will be forcibly redirected to the sandbox.
Don’t use sandbox messaging in a production environment or for junk. If you will abuse it, we reserve the right to restrict your sandbox access.
Common issues
I added the contact to the sandbox list, but when I try to send a message to this number, I get an error that this contact doesn’t have an active conversation with the sandbox.
Here are the following reasons for this error message:
- You added the wrong number. Make sure you added a number that was selected in “Start new conversation from”. If you have already sent a message and then change this option, you should use the previously selected line.
- This number doesn’t send a message to the sandbox. It’s a main requirement to use a sandbox with a line from the sandbox list, as it helps confirm that this line is under your control and that you don’t try to send an outbound message to a random contact who doesn’t expect it.
I already initiated a conversation before, but when I send an outbound message from the sandbox to my phone number, I get an error that I need to init conversation again.
The sandbox has a limitation: once a contact on the list sends an inbound message to the sandbox, it opens a 24-hour messaging window. During this time, you can send an unlimited number of outbound messages. The 24-hour window resets for each inbound message from the contact.
This limitation DOESN’T apply to a dedicated sender name in production.
I am already using a dedicated sender name, but all my outbound messages to my personal number still send from the sandbox.
Most likely, you forgot to remove your number from the sandbox list. If the number is still there, all outbound sendings will be forcibly redirected to the sandbox. You need to remove your contact from the sandbox list.
”Start new conversation from” option
This option helps you select which phone number (or email) will be used for init conversation with a new contact in the Messages app on your iPhone/Mac. It’s important to check this option in advance before using the sandbox. Otherwise, if you have already init a conversation with the wrong contact, you will not be able to change it anymore, because this conversation is already linked to your previous line and it can’t be considered as a “new conversation” on the sandbox side.
iOS
If you’re messaging with the sandbox from your iPhone, you can check this option by following the next steps:
- Open Settings.
- Tap Apps.
- Tap Messages.
- Tap Send & Receive.
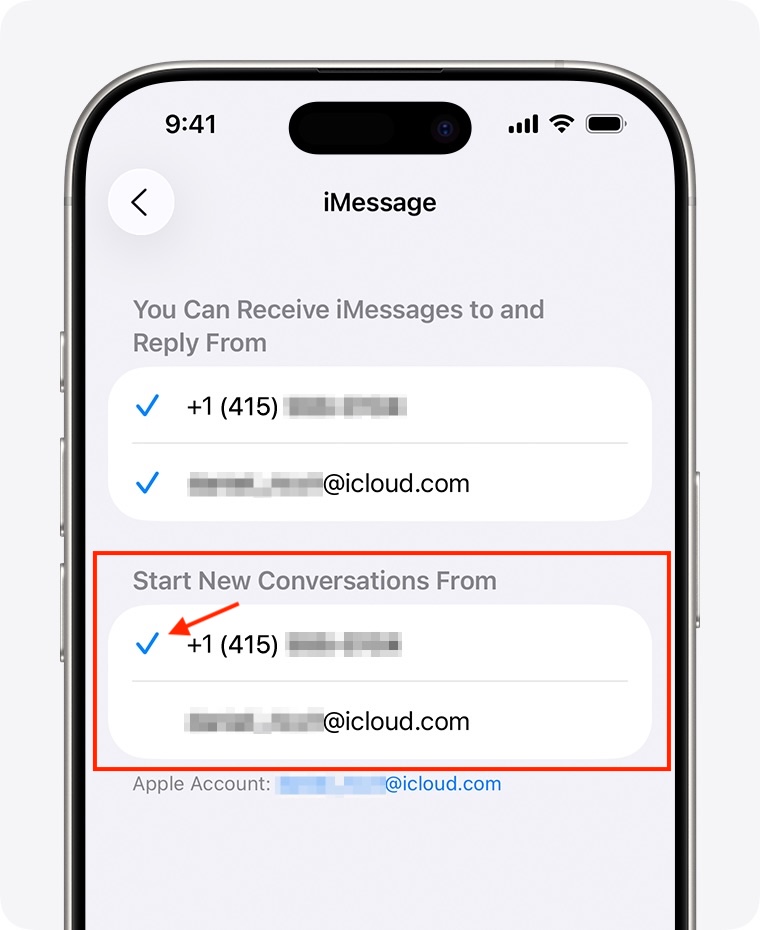
- In the “Start New Conversations From” options, tap the phone number that you want to use.
Please note that these steps are related to iOS 26. If you are using a newer or older version, these steps may differ. You can also try finding this option in the settings search bar by typing Messages or Send & Receive.
macOS
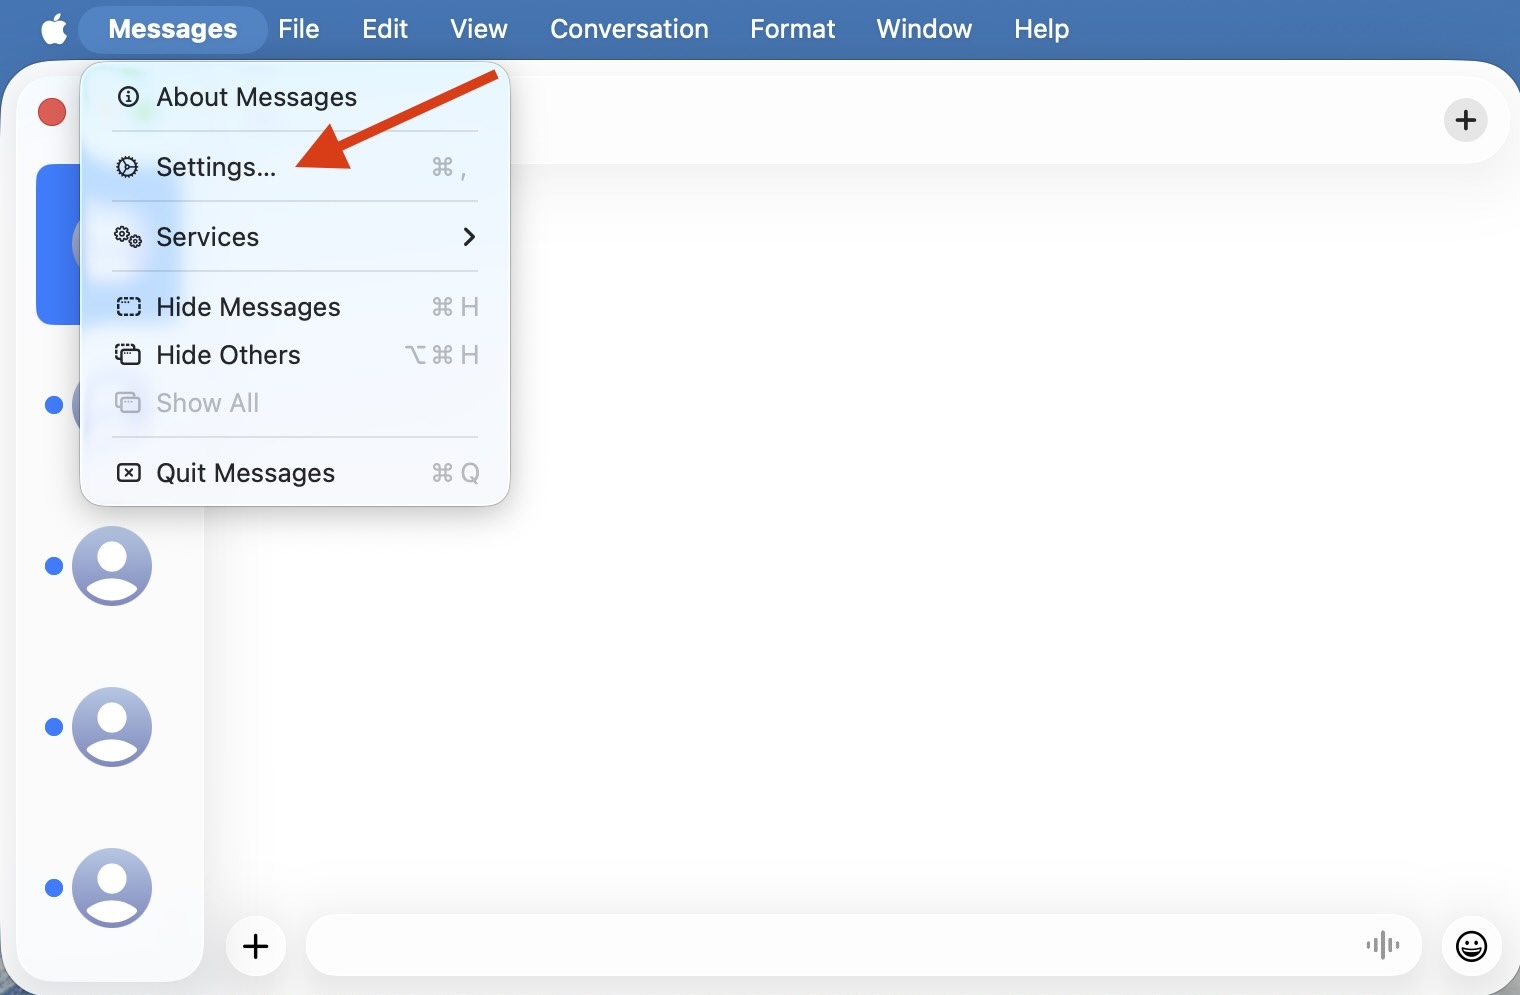
If you’re messaging on your Mac, you can check this option by opening the Messages app and selecting Settings… in the top bar.
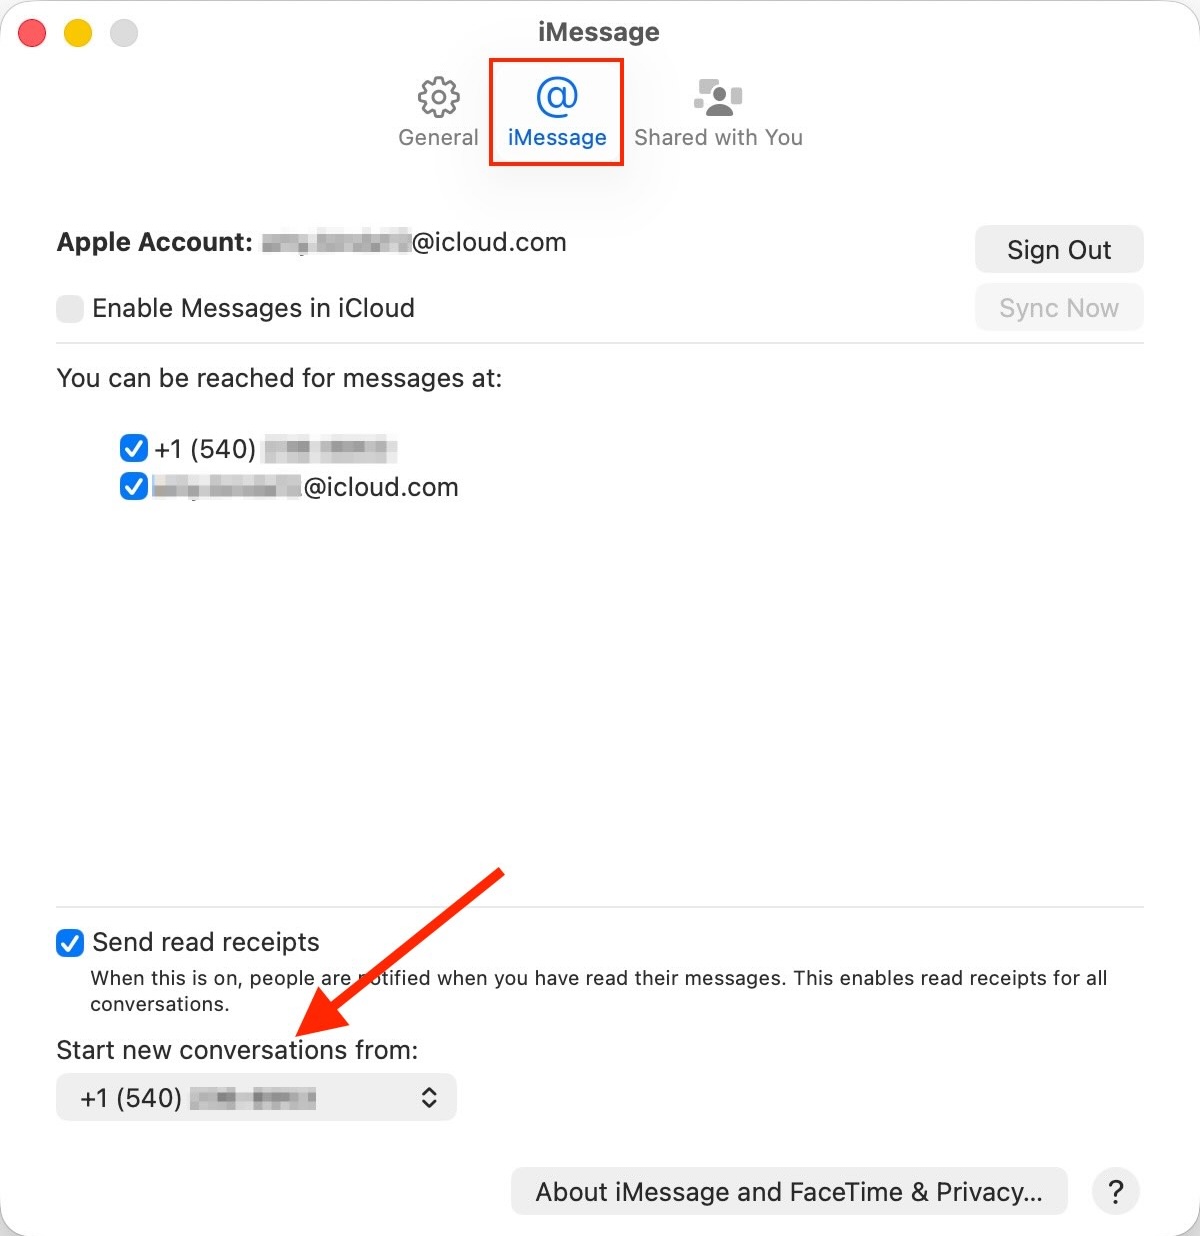
Then, in the Settings window, select iMessage tab, and check the Start new conversations from option.
Please note that these steps are related to macOS 26. If you are using a newer or older version, these steps may differ.